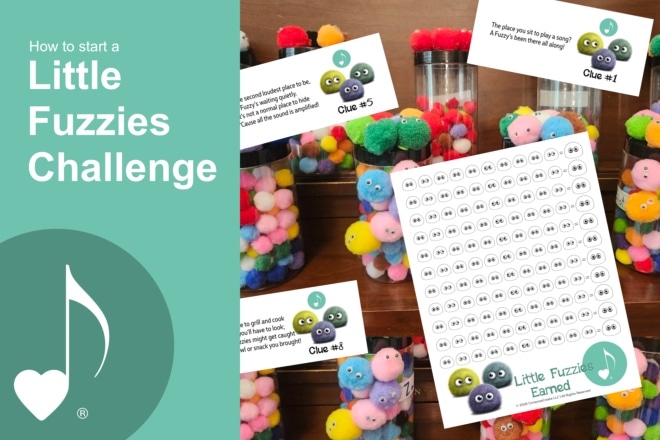
Practicing

Holiday Sight Reading Challenge

Posted by on Nov 7, 2011 in Games and Activities, Piano Teaching, Practicing, Wendy's Piano Studio | 3 comments

On the goal setting form I had students fill out in August, many of my students expressed that they wanted to be better sight readers. In the past few months, my students have participated in a Sight Reading Challenge in which every day they practiced I said I would give a certain amount of money to a local charity.  I am going to write more about this at another time of year. But, my students were so excited about that challenge that I wanted to do another one from now until Christmas.

Well, I suppose I have to show you the chart on which we kept track of their progress, because it was this chart and their creative decorating of each of their quarters, that gave me an idea for this next Sight Reading Challenge.  Look closely at the picture and you will notice their creativity unfold from the left to the right.  About half way through the challenge, some of my students even started decorating their quarters like flags, then pumpkins, then all kinds of things!

So, I began thinking that it would be fun for my students to have ornaments that they could decorate. In addition, I always need a little help decorating the studio for Christmas, so I thought that it would be even more fun for them to try to fill one of my walls with bigger ornament that they decorated.

Well, I was right!  They are very excited, so I thought I’d share with you how the challenge is working and what they are getting as a result:

  • Each student fills in 1 little ornament on the ornament chart for every day that they sight read (see page 2 of the download).
  • For every 5 days, they get to decorate a bigger ornament which I will then place on the wall.
  • If their wall ornaments reach from one corner of the wall to the other by December 12th, they will get 15 extra minutes of games at their Christmas party on December 19th!  (I have carefully measured the wall and each ornament to see how far they should get if each student gets one big ornament a week…the 5 days they are supposed to practice.)  The chart of the smaller ornaments on the wall also helps students feel compelled to sight read as they know their peers will notice if they are not keeping up!

You can download the Christmas Ornaments and use them in your own studio (feel free to use them for other challenges besides sight reading).  Let me know how you reward your students for sight reading!

Want to receive email updates about new ideas like this one?  


Read More

Keeping Progressions, Inversions, and Arpeggios Straight

Posted by on May 11, 2011 in Piano Teaching, Practicing, Theory | 9 comments

Keeping Progressions, Inversions, and Arpeggios Straight

A few weekends ago, my students participated in the Kansas MTA musicianship exams called Music Progressions.  One of my piano teacher friends and I were in the office commenting on how difficult it is for some students to remember the correct terms for the scale skills that they play.  The students are usually able to play them, but if you ask them to name what they are playing or play a particular one, they often ask, “Do you mean this? Or this? Or this?”  My friends Julie was remarking that in the case of chord progressions, it seems like if you hum this little tune, they understand:

So, that got my lyrical mind thinking and I decided that my solution is going to be to

Read More

Great idea from the April MTNA e-Journal

Posted by on Apr 21, 2011 in Piano Teaching, Practicing | 1 comment

Great idea from the April MTNA e-Journal

The April MTNA e-Journal is out and the first paragraph from the editor contains an excellent idea!  Patricia Powell, e-Journal Committee Editor writes,

May is National Sight-Saving Month, and in my independent piano studio, we are gearing up for our annual sight-reading challenge. The parents and I sponsor the children to sight-read daily for 20 days.  It connects us to our community by raising funds for a local visual health charity, while raising the student’s sight-reading skills–a most precious commodity for musicians!

Isn’t that a fantastic idea?  She goes on to talk about developing a vision for enriched musical understanding that will stay with our students for life, regardless of their vocation.  I’m looking forward to looking through this month’s e-Journal, but the sight-reading challenge was such a novel idea that the little time I just spent skimming the journal was well worth it!

Read More

Sight-reading Skills: Developing Your Sense of Touch

Posted by on Nov 15, 2010 in Piano Teaching, Practicing, Technology | Comments Off

by Kevin Costley

There are many times in life that being a fast sight-reader comes in handy. Although I believe sight-reading is a natural talent for some pianists, it is a skill that others have to work hard to achieve.

If you find that you continue to struggle with sight-reading, you might ask yourself the following questions:

“How well do I know the ‘feel’ of the piano?”

“When I shut my eyes, what can I play accurately?”

“What can I find at the keyboard without looking?”

Your answers to these questions may indicate that this is a good time to go back to the basics and get a ‘feel’ for the keyboard. Try doing the following exercises every day for several weeks before you practice your piano repertoire.

1.   Good sight-readers know to not look down at their hands while sight-reading. They play both hands by “feel.” Do the following: play all groups of three black keys and groups of two black keys up and down the piano, hand separately, with your eyes closed. Be consistent with your fingering. Be sure to not look at your hands.

2.  Now, do the same procedure for the notes CDE (in clusters) and FGABC (in clusters). Be sure to not look at your hands.

3.  Are you doing well with Steps 1 and 2? If not, make sure you are centered to the middle of the keyboard. Those who are good sight-readers make sure they are always centered before playing! Every time you sit down at the piano, check your body position!

4.  Review the groups of the lines and space notes in both the treble and bass clef. Come up with your own sentence to learn them well; a sentence made up by you will be most meaningful. An example with the treble clef for lines is “Every Good Bear Deserves Fish.” You should then come up with a sentence for the treble clef spaces as well as a bass clef treble and bass clefs. The goal is to say the FIRST LETTERS as quickly as possible (i.e. EGBDF) so that the mnemonic is not needed. When you can say the first letters of these sentences quickly and even name the note on individual lines and spaces without saying the entire set of letters, you will be able to quickly identify and find the note while sight-reading.  Mnemonics make learning the lines and spaces more fun, yet the sooner a student can say the first letter of the lines (i.e. e,g,b,d,f) QUICKLY, the better.

5.  Before emphasizing rhythms (see #6), look through the entire piece and look at the patterns in intervals, patterns, and melodies. STUDYING THE SCORE IS VITAL before sight-reading the score!

6.  Now it is time for an emphasis on rhythms. Practice clapping all rhythms hands separately is a good thing to do; however, play all rhythms hands TOGETHER playing two notes that make harmony (i.e. left hand low C with two finger; right hand E above middle C, two finger). You can use any variation of harmonies you want.

7.  Now ignore all rhythms. With both hands together, play ALL NOTES. Get the notes correctly the first time. Play very slowly; be accurate with all notes!

8.  Now, look in your piano bench and locate a very easy piece several levels lower than the level you normally work on. Play hands together slowly and evenly, up to tempo. Force yourself to keep going no matter how many notes you may miss. Do not stop even once; keep playing until you finish this very easy piece. (This can be a humbling process!) Do this with many easy pieces until you can gradually play more difficult pieces. (At this point, do not attempt to sight-read at your every day ‘working level.’

9.  When you are up to your proficiency level, play (sightread) each piece hands together very SLOWLY and evenly. This takes much concentration! Try your best to not stop or stall. If you do stall, DO NOT return to the beginning of the piece. Begin where you missed the note(s).

10.  Keep studying music theory. Theory is vital for all musicians, especially sight-readers.

Even the best sight-readers miss some notes and do not play each and every note. Because of their extensive experience in sight-reading and an overall understanding of chord structures, patterns, etc., accomplished sight-readers get an overall ‘feel’ of where music begins, how it develops and how it ends. Even the best sight-readers learn to keep going. When they know they have missed a note or notes, they never stall; they keep moving forward and put those missed notes out of their minds. Great sight-readers are popular musicians; there are many roles they can fill in the musical world! By following these simple steps on a regular basis, your sight-reading skills more assuredly will improve!

Happy Sightreading!

[Thank you Kevin, for contributing this helpful article on sight-reading!]

Read More

Making Music Come to Life: The Bear

Posted by on Oct 13, 2010 in Creativity, General, Piano Teaching, Practicing | 5 comments

Last week, I gave away the first of my erasable highlighters to 3 students who showed me that they were consistently “practicing smartly.”  You can read more about how I structured this mini-incentive program here.  I’m really excited about this little program because it is teaching the students to be their own teacher by asking them to “mark up” their music when they make a mistake rather than just trying to practice it randomly and make it better.  It’s asking them to be the teacher and to listen with a teacher/musician’s ear so that they can hear what they need to mark.  Their practicing is much more focused now that they can see where they need to focus every time they open their book.   After I have seen 3 consecutive weeks of their own pencil markings in their music, I give them the erasable highlighter to use for the same purpose.

Today, I had to chuckle at what one of my students did with their erasable highlighter.  To appreciate it fully, you need to know that this particular student has very specific music tastes…rainbows, fairies, and pink would be the best way to describe her tastes!  So, I have to work to expand her taste for other styles.

I’m sure you can imagine the difficulty that I had when introducing Rebikoff’s piece “The Bear” full of tritone dissonance and pesante sounds!  I asked her to make up a story about a bear (she likes movie music) for this piece and to pretend that the piece was music for a film about a bear.  She came back this week and told me that she could “draw the bottom of a bear better than the top” so she made her bear eat berries off of a bush.  This is what her piece looked like this week:

Of course this is only the top line of her piece and there were many other markings that indicated how she should play, but her picture and comment made me laugh and I wanted to share this with you.  Most of the time, the erasable highlighter is used to highlight things that need to be fixed, but for this particular student, it was a way to make the music come to life!  I might not always want my students to use their erasable highlighter so extensively, but I thought it was great since the way she played her piece was so fresh and alive.

Encouraging students to use their imagination in their pieces almost always helps them connect with the piece better and play more musically.  And if connecting and playing musically means that the piece is covered in erasable highlighter, then so be it!

Read More

Evidence of Practicing Smartly

Posted by on Sep 15, 2010 in Piano Teaching, Practicing | 7 comments

When I began my fall semester a few weeks ago, I told my students that they could each earn their own Erasable Highlighter to use in their home practice time if they demonstrated that they were practicing well at home.  I then sent home a list of ways that I would be able to tell that they were indeed ”practicing smartly” as I called it.  I was wondering if you all would help me add to this list other things that you look for to tell if your students are practicing smartly?

How does my teacher know I am “practicing smartly?”

  • I will be able to play my piece like I have been asked (Counting out loud, Correct notes, Musically, etc.)
  • My music will be marked up in the places I had trouble during the week  (Circles around missed notes; Circles around overlooked details like staccatos, dynamics; Counts written in when I’ve had trouble, etc.
  • I will be able to play my piece or a part of my piece with few or no mistakes.
  • I will be able to play my piece musically because I will be paying attention to the details. (Or adding musical details of my own that make sense.)
  • I will write short notes in my practice journal about my goals and what I did that day.

What else would you add?

Read More
Rss Feed Tweeter button Facebook button Youtube button